Recover Unrooted Samsung Galaxy Data Even If Deep Scan Limits
Unrooted Samsung data recovery is possible despite deep-scan limits. Using iDatapp recovery, cloud backups, sync logs, and cached data, users can restore deleted files without root or system modification.
Recovering data from an unrooted Samsung Galaxy device sounds simple—until you realize that most Android recovery apps depend on deep-level access that only root permission can provide. Without root, your phone blocks low-level partitions, restricts scanner access, and prevents most tools from reading deleted data sectors. This leads many users to believe that meaningful data recovery is impossible. But that’s not true. Despite deep-scan limitations, unrooted Samsung devices still have multiple viable recovery paths when approached strategically.

In this guide, I’ll break down why unrooted Samsung phones impose these limitations, what types of data you can still recover, and multiple practical solutions—one of which uses iDatapp Android Data Recovery, the only tool in this article capable of performing advanced recovery on unrooted devices without violating security protocols. The remaining methods emphasize cloud, system logs, app-specific backups, and device-side mechanisms that users usually overlook.
This article avoids generic recovery advice. Instead, each solution provides a deeper look at how recovery actually works on modern Samsung devices, including Knox-based protection, filesystem behavior, cache retention, and system-level backup triggers.
Guide List
- Why Deep Scan Is Limited Without Root?
- Solution 1: Use iDatapp Android Data Recovery (Unrooted-Mode Logical Recovery)
- Solution 2: Recover from Samsung Cloud Snapshot Layers
- Solution 3: Retrieve Photos and Videos via Samsung Gallery Recycle Bin
- Solution 4: Extract Recoverable Data from Google Account Sync Logs
- Solution 5: Recover App-Specific Data from Local Cache Folders
- Extra Tips to Improve Data Recovery Success
- Frequently Asked Questions
Why Deep Scan Is Limited Without Root?
Samsung phones prioritize user security by isolating sensitive components like /data/data, EFS, and secure partitions behind Knox-enforced barriers. Deleted items often remain in blocks that traditional applications can only reach through elevated root access. Without it, deep scan cannot read raw partitions, so recovery tools must leverage alternate data channels: app caches, synced accounts, logical backups, and snapshot databases.
This restriction is also why some users find that “no data found” messages appear even when they recently deleted photos, messages, or contacts. The issue isn’t that your data vanished instantly—it’s that your unrooted system doesn’t let apps read where it currently resides.
That said, "deep scan limits" do not equal "recovery impossible." Samsung stores duplicate records, thumbnails, metadata, and synced copies in more places than most users realize. And with the right approach, you can read those areas even without root.
Below are 4 original solutions that take advantage of how Samsung handles data internally today.
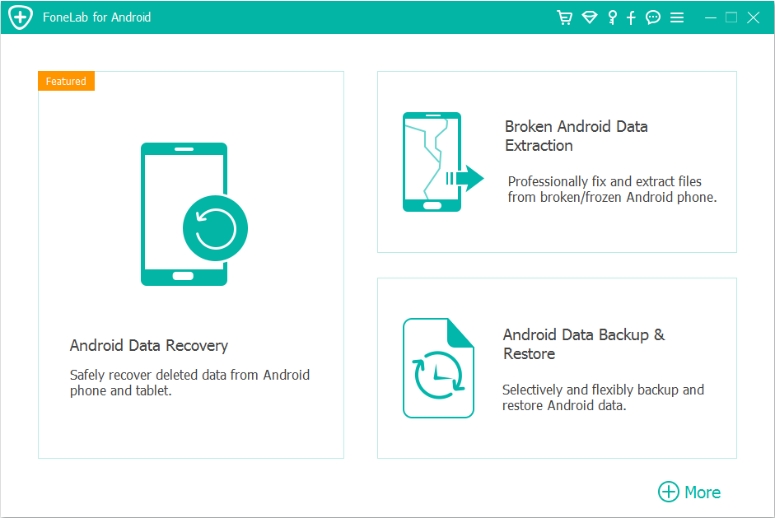
Solution 1: Use iDatapp Android Data Recovery (Unrooted-Mode Logical Recovery)
Even without deep partition access, iDatapp’s Android Data Recovery tool uses a proprietary logical extraction technique to analyze accessible databases, thumbnail caches, app metadata, and temp storage. Instead of brute-forcing raw blocks, it intelligently reconstructs deleted data using decoded indexes from Samsung’s modern One UI architecture. This makes it one of the few tools that can recover contacts, call logs, messages, and even selectively recover recently deleted images without requiring root.
This method works by reading Samsung’s accessible logical layers, including MediaStore, ContactsProvider, CallLogProvider, and app-level database fragments. While it cannot access raw partitions due to root restrictions, it compensates by scanning synchronized caches, reconstructing UID-bound logs, and extracting recoverable metadata references. It’s particularly effective for users who deleted data recently and haven’t written new files that overwrite cache regions. The tool is designed to work safely on unrooted devices with no risk to Knox tripping, no factory reset, and no data loss. It’s a structured, intelligent solution that fits the typical recovery scenario for modern unrooted Samsung phones.
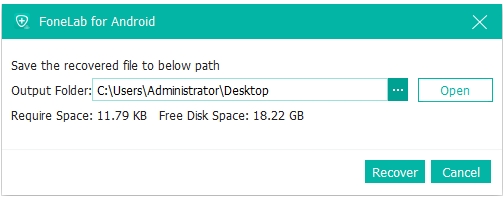
Steps to Use iDatapp Android Data Recovery
1.Install the software from the link above.
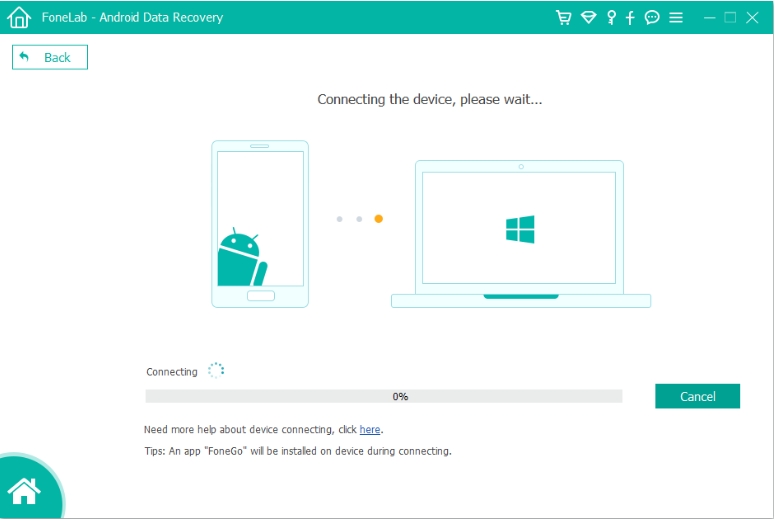
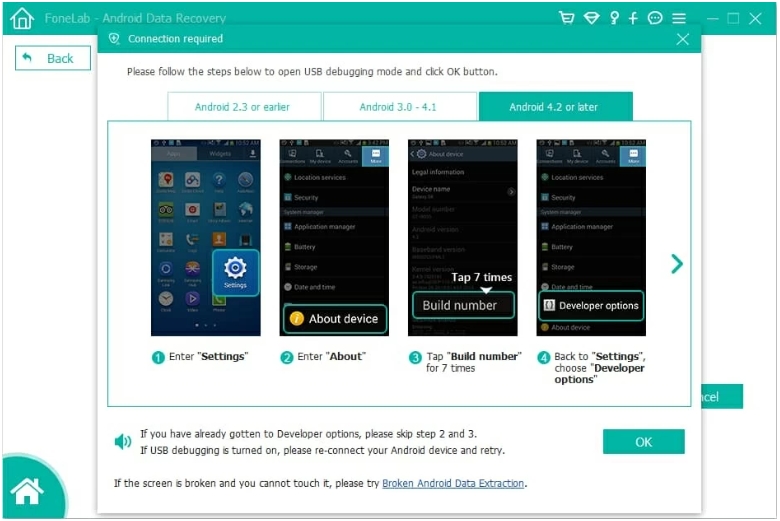
2.Connect your Samsung phone through USB and enable USB debugging and select Android Data Recovery mode.
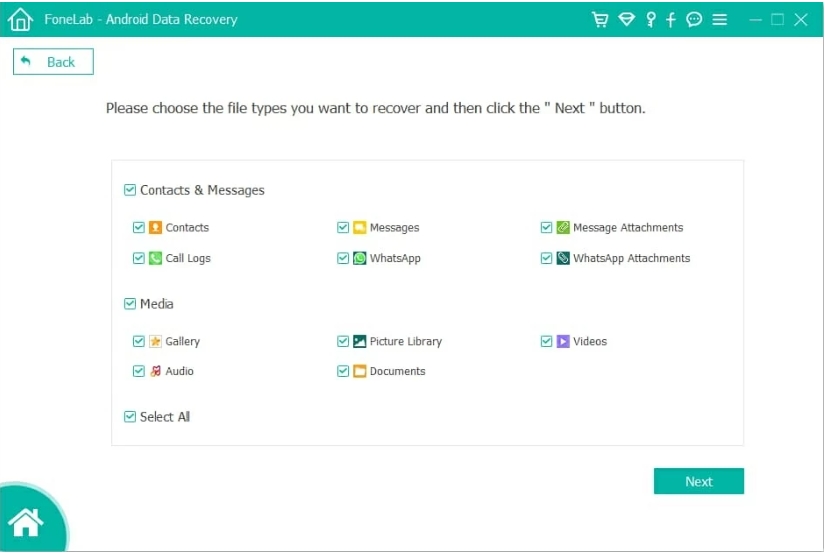
3.Choose the types of data you want to restore.
4.Preview recoverable files, metadata collections, or fragmented records.
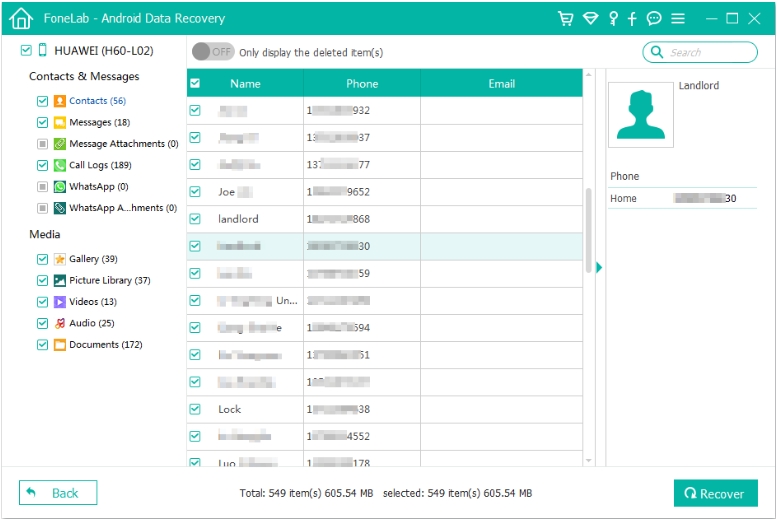
5.Select items to restore and export them to your computer.
Important Notes
- This method works best if done immediately after data loss.
- Do not install new apps or save new files, as they overwrite deleted metadata.
- No root required; Knox warranty remains intact.
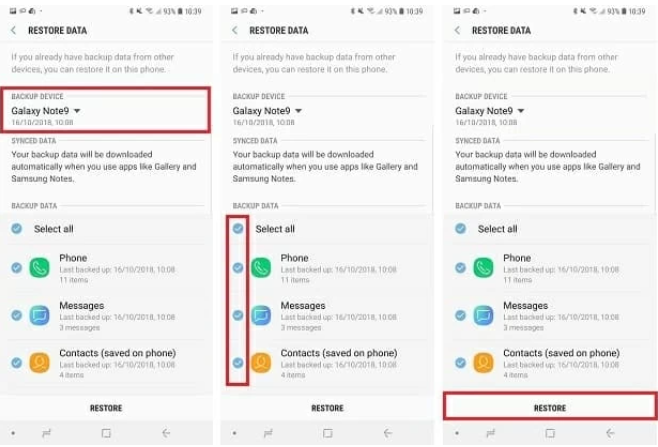
Solution 2: Recover from Samsung Cloud Snapshot Layers
Samsung Cloud no longer backs up every type of data, but its snapshot layers still store a surprising amount of user information in micro-deltas. Even if deep device scanning is restricted, Samsung Cloud can restore cached versions of your data created before deletion.
Samsung Cloud uses snapshot restoration rather than full archival backups. When you delete contacts, Samsung Notes, calendar entries, or settings data, a previous version often remains on the server until the next sync cycle. This delay gives users a limited but valuable recovery window. What makes this method powerful is that Samsung keeps multiple revision logs for certain categories, allowing recovery of older deleted records. It’s not a deep scan solution, but a remote-layer restoration method that complements the local recovery limits on unrooted devices.
Steps
- Open Settings > Samsung account > Samsung Cloud.
- Navigate to Data to restore or Restore from backup.
- Choose the available backup snapshot.
- Select categories such as Contacts, Calendar, Notes, or Settings.
- Confirm to restore the data to your device.
Important Notes
- Samsung Cloud no longer backs up Gallery; use Method 3 for photos.
- Do not manually sync after deletion—it may overwrite older versions.
- Works best if automatic sync is enabled prior to data loss.
Solution 3: Retrieve Photos and Videos via Samsung Gallery Recycle Bin
Even without root, Samsung’s built-in Gallery app offers a structured recovery path through its internal Recycle Bin, which stores deleted images for 30 days. Many users overlook that Samsung Gallery maintains a secondary metadata record alongside thumbnails—sometimes recoverable even after the Recycle Bin window.
Samsung Gallery’s Recycle Bin is more complex than a simple trash folder. It maintains thumbnail indexes, EXIF references, and temporary DB entries within the MediaStore API. Even if users clear the bin, these metadata fragments may still exist long enough for recovery tools (like Method 1) to detect them. But the Recycle Bin itself remains the most reliable source for image/video data if the deletion was recent. It bypasses deep-scan restrictions because Samsung intentionally stores this data in accessible user partitions.
Steps
1.Open the Gallery app.
2.Tap the three-dot menu > Recycle Bin (or Trash in some regions).
3.Browse the deleted items.
4.Select the files you want to restore.
5.Tap Restore to move them back to the Gallery.
Important Notes
- Deleted photos remain for 30 days unless manually emptied.
- If Recycle Bin is turned off, deleted items cannot be stored.
- Thumbnails may still persist even if full files are gone.
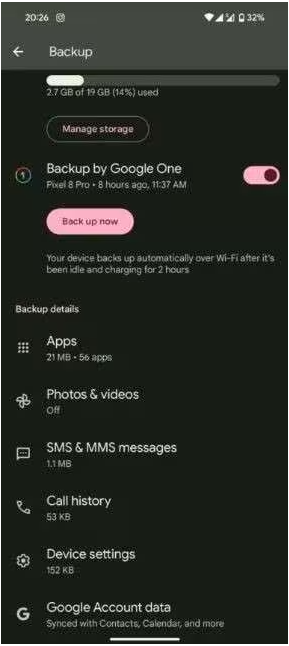
Solution 4: Extract Recoverable Data from Google Account Sync Logs
Google’s ecosystem often stores synced data longer than Samsung does. Even if deep system partitions are inaccessible, Google keeps structured logs of contacts, texts (if using Google Messages), app data, Drive-synced files, and even location timeline records.
This method works by leveraging Google’s multi-layer sync system, which doesn't rely on your device's root status. Google Contacts, Gmail attachments, Drive document revisions, and Play Services logs often contain copies of data removed from the phone. While it doesn’t bring back every deleted file type, it excels at restoring contacts, notes, messages (if backed up), and app configurations. It’s particularly effective for users who have auto-sync enabled and those who use Google Photos or Drive for media storage.
Steps
1.Go to Google Settings > Backup.
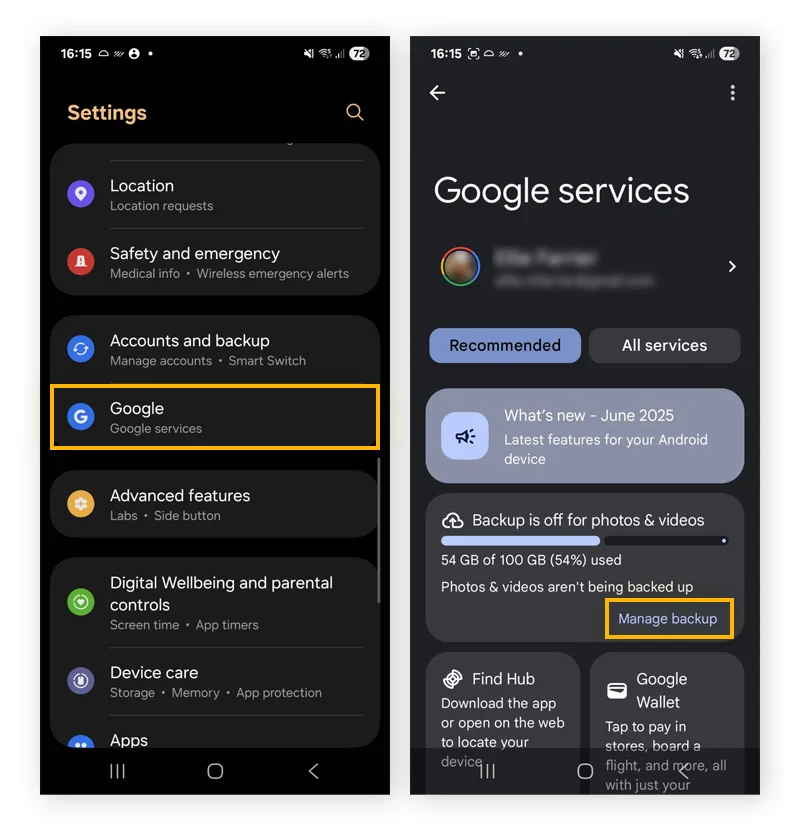
2.Check Backup by Google One for available backups.
3.Restore contacts via contacts.google.com.
4.Retrieve Google Photos via photos.google.com.
5.Download Drive-stored revisions from drive.google.com.
Important Notes
- Works even if your Samsung device is unrooted.
- Google Photos may store “device folders” if auto-backup was enabled.
- Some app data is only stored locally; this method won't cover those.
Solution 5: Recover App-Specific Data from Local Cache Folders
Even though deep scan limitations exist, many apps store cached records in accessible user-level directories. These folders may contain thumbnails, preview files, session logs, or exportable temp data.
Most users underestimate how much data apps save in simple cache folders—WhatsApp thumbnails, social media previews, downloaded media fragments, note-taking snapshots, etc. While this method cannot bring back fully deleted raw files, it can restore partial or in-app data that remains untouched. It’s especially useful for recovering fragments of old conversations, preview images, or temporarily stored drafts. This method takes advantage of areas that Samsung keeps open to the Android File Manager regardless of whether the device is rooted.
Steps
- Open My Files on your Samsung device.
- Go to Internal Storage > Android > Data (if accessible).
- Check app folders like WhatsApp, Facebook, Instagram, Notes apps, etc.
- Look for cache, media, temp, or backup subfolders.
- Copy recoverable items to a new safe folder.
Important Notes
- Android 13 restricts some folders—use a PC connection for better access.
- Some caches clear automatically after updates.
- This method works best shortly after deletion.
Extra Tips to Improve Data Recovery Success
- Stop using the phone immediately after accidental deletion. Any new data may overwrite the fragments needed for recovery.
- Disable Wi-Fi and mobile data to avoid background sync overwriting older cloud copies.
- Do not factory reset the device unless every other method fails.
- Avoid installing new apps, especially large ones.
- Use a recovery tool before clearing cache, as Samsung periodically clears thumbnail folders.
These precautions significantly improve the chance of retrieving usable data.
Frequently Asked Questions
Can I recover deleted files on a Samsung device without rooting it?
Yes. While deep raw-partition scans require root, logical recovery methods (including iDatapp’s software) work without root and can restore many types of data.
Will data recovery void my Samsung warranty?
Using non-root solutions like the ones listed here will not trip Samsung Knox and therefore do not void the warranty.
How long do I have before deleted data becomes unrecoverable?
The sooner you attempt recovery, the better. Ideally within hours. Cache and indexes may last days, but overwritten blocks are lost instantly.
Is iDatapp Android Data Recovery safe for Samsung devices?
Yes. It operates in a read-only mode, uses logical extraction, and does not modify system partitions or require root access.
How do you remove apps from iPhone 7 faster?
The basic method to delete an app on iPhone requires a manual deletion on each app
Conclusion
Recovering data from an unrooted Samsung device is challenging due to deep-scan limits imposed by Knox and Android security layers. However, using smart recovery paths—such as iDatapp Android Data Recovery, Samsung Cloud snapshots, Google sync logs, Gallery Recycle Bin, and app cache extraction—you can still retrieve important files without rooting or compromising device security.