iDATAPP Video Repairer can help fix/restore videos with lost or corrupted data.
How to Recover Photos from SD Card Free?
Learn how to recover deleted or lost photos from an SD card using five effective, free methods—including iDatApp Data Recovery, CHKDSK, File History, Recycle Bin, and PowerShell commands.

Whether it’s vacation memories, special family moments, or work-related media, losing photos from an SD card can feel like a small disaster. It's a common problem—accidentally deleting photos, formatting the card, or a corrupted SD card suddenly turning unreadable. So, the burning question is: how to recover photos from SD card free without relying on expensive third-party tools?
In this article, we’ll walk you through this issue, analyze why SD card photo loss happens, and introduce five real, effective, and free ways to recover deleted or lost pictures from an SD card. Unlike other articles that promote only well-known third-party apps, we’ll focus on practical solutions, including using built-in system tools, free recovery tricks, and one professional-grade method powered by iDATAPP that gives you the best chance to recover everything safely.
Guide List
- Way 1: Recover Deleted SD Card Photos with iDATAPP Data Recovery (Best Success Rate)
- Way 2: Use Windows File History (If Enabled Before Loss)
- Way 3: Recover from Windows Recycle Bin (For Card Readers That Link to Explorer)
- Way 4: Try CHKDSK to Fix Logical Errors and Access Hidden Files
- Way 5: Use Windows PowerShell to Search for Hidden or Temporary Files
- Extra Tip: What Not to Do After Deleting SD Card Photos
- Frequently Asked Questions
- Summary
Why Do Photos Get Lost from SD Cards?
Before jumping into solutions, let’s understand the common reasons for SD card photo loss:
- Accidental deletion (most common)
- Formatting the SD card without backup
- Corruption due to unsafe ejection or virus attacks
- File system errors or physical damage
- Unsupported file formats or device incompatibility
Each of these issues might seem different, but the underlying principle is the same: when photos are deleted or lost from an SD card, they’re not truly "gone" right away. Until overwritten, that data can still be recovered using the right techniques.
Way 1: Recover Deleted SD Card Photos with iDATAPP Data Recovery (Best Success Rate)
When it comes to retrieving lost or deleted photos from an SD card, using a reliable and specialized recovery tool offers the best chance of success. The iDATAPP Data Recovery software stands out because it is purpose-built to handle various SD card photo loss scenarios—including accidental deletion, formatting, logical errors, and even corruption. What sets iDatApp apart from generic recovery tools is its deep scan engine, which thoroughly analyzes storage sectors to locate traceable data fragments. Unlike other tools that offer only partial recovery or require advanced technical skills, iDATAPP features an intuitive interface suitable for beginners while providing professional-grade results. It supports a wide range of photo formats (JPG, PNG, BMP, GIF, RAW, etc.) and works seamlessly on both Windows and Mac. Whether you're dealing with a 2GB microSD or a 512GB SDXC, iDatApp is optimized to recover what matters. Let’s walk through exactly how to use it step by step.
- 100% safe and virus-free
- Intuitive wizard-based interface
- Supports all major photo formats (JPG, PNG, RAW, etc.)
- Works even with corrupted or formatted SD cards
How to Use iDatApp to Recover SD Card Photos:
Step 1: Download and Install
Download and install the software on your Windows/Mac.
Step 2: Insert Your SD Card
- Use a card reader to connect your SD card to your computer.
- Launch iDATAPP and select your SD card from the drive list.
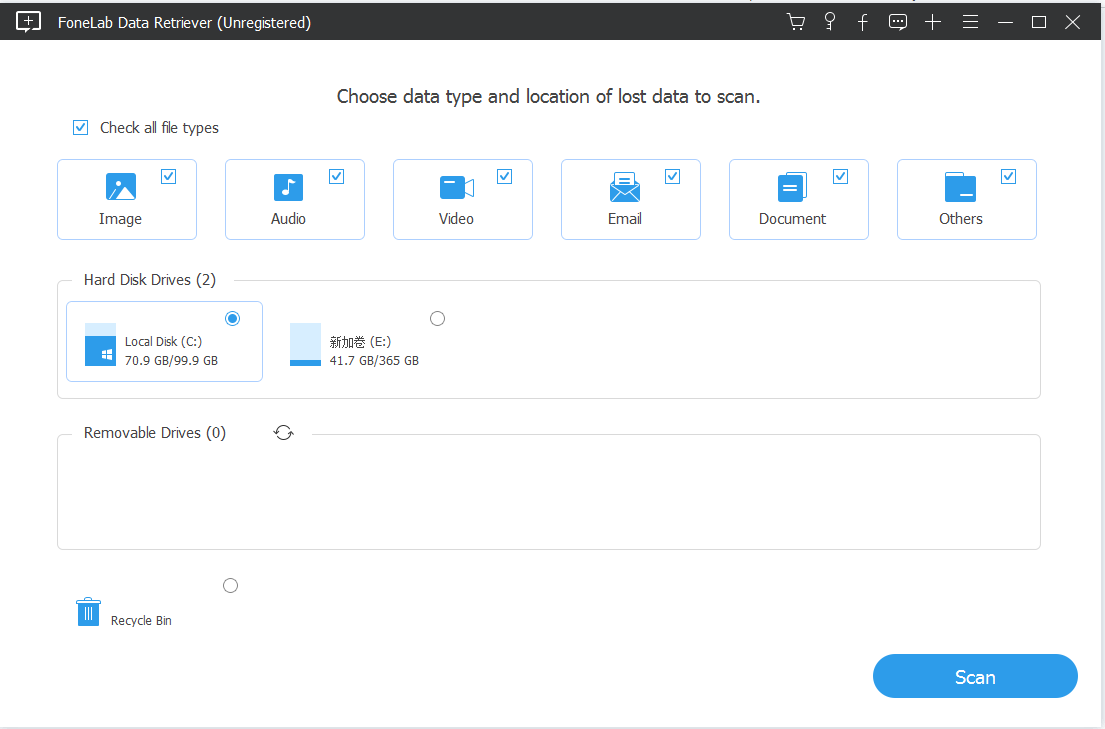
Step 3: Start Scanning
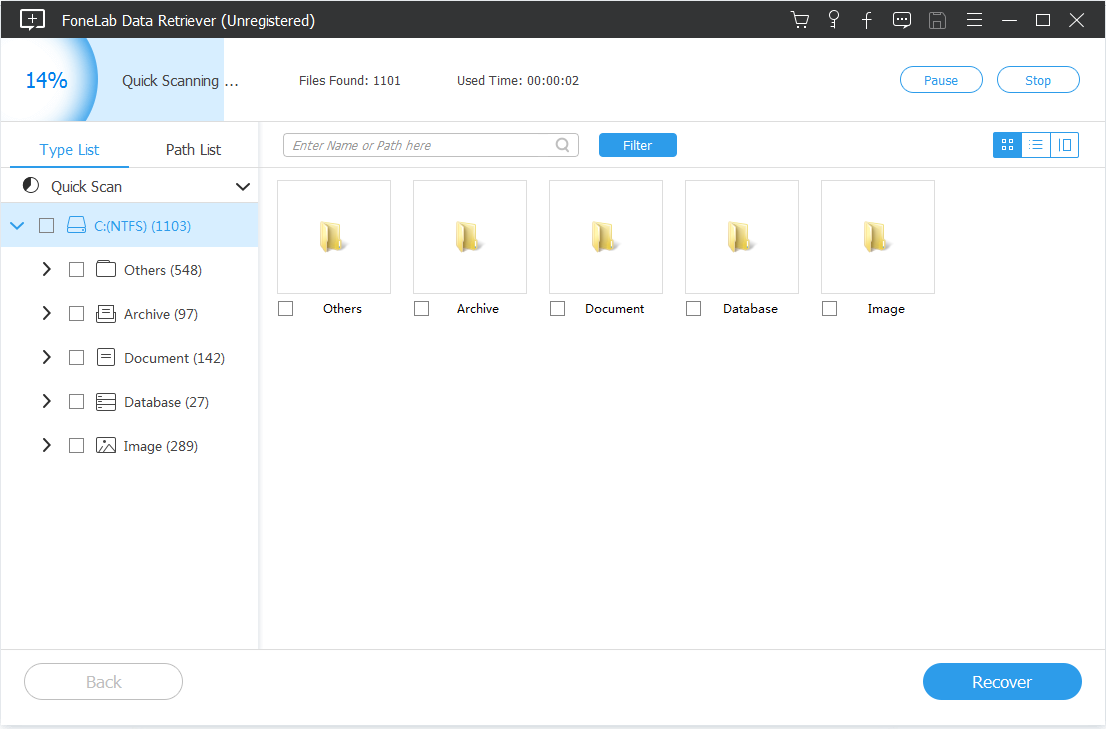
- Click “Scan” to begin. Choose "Deep Scan" for better results.
- Wait while the software analyzes the deleted files.
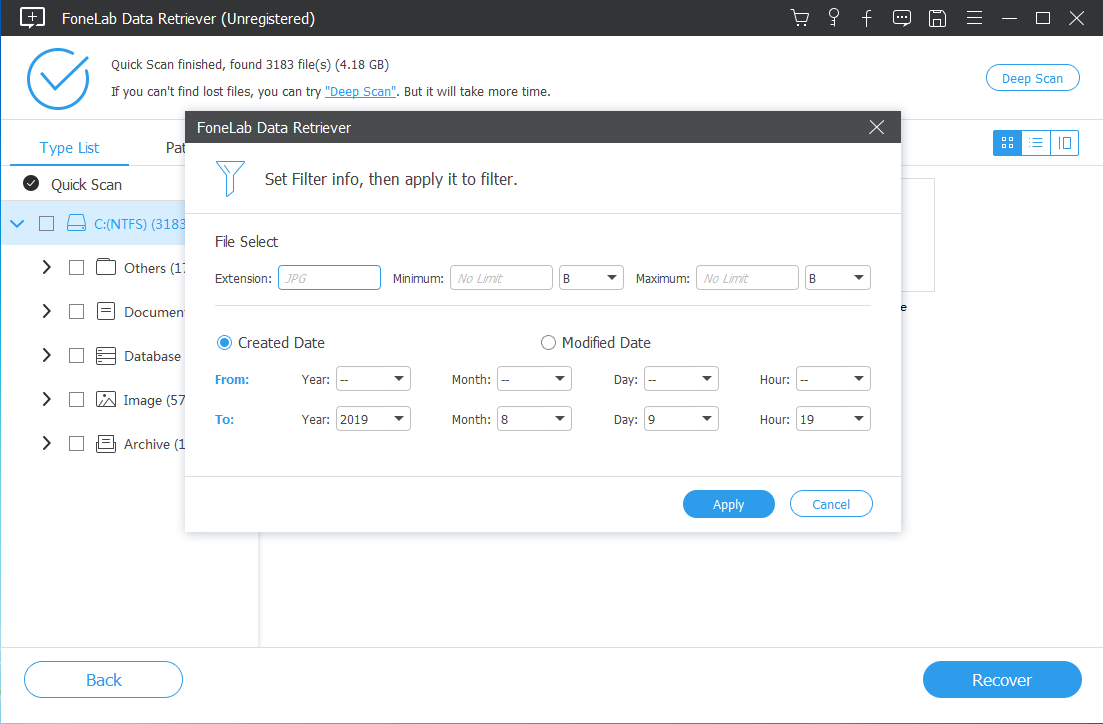
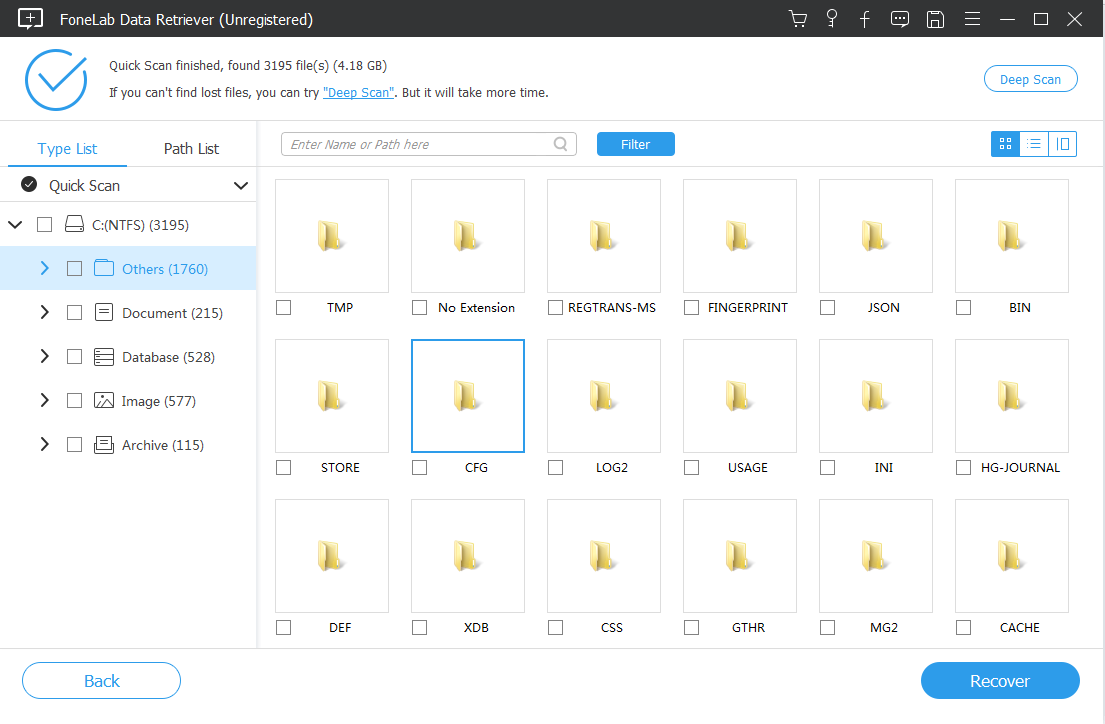
Step 4: Preview and Recover
- After scanning, preview recoverable photos.
- Select the files you want and click "Recover".
Way 2: Use Windows File History (If Enabled Before Loss)
Windows File History is a built-in feature that many users overlook until it’s too late. But if enabled prior to the data loss event, it can serve as an excellent free tool for restoring photos deleted from your SD card—especially if your photos were once backed up or synced to a folder like "Pictures" or a custom location on your PC. File History works by automatically creating backups of files stored in monitored folders, allowing users to roll back to earlier versions. While it’s not a dedicated SD card recovery tool, it can be surprisingly effective if your SD card was used to import photos that were then transferred to your computer. It's worth checking even if you don’t remember turning it on; Windows sometimes enables it by default. Let’s explore how to use File History to retrieve lost SD card images in a few easy steps.
How to Recover Photos from File History:
Step 1: Connect Your SD Card
- Ensure the SD card is inserted and accessible.
Step 2: Open File Explorer
- Navigate to the folder on the SD card where photos were stored.
Step 3: Right-click > Properties > Previous Versions
- Select “Restore previous versions.”
- A list of available backups will appear.
Step 4: Restore
- Click “Restore” to bring the files back.
Note: This works only if File History or a system backup was previously enabled.
Way 3: Recover from Windows Recycle Bin (For Card Readers That Link to Explorer)
Believe it or not, your deleted SD card photos might still be sitting safely in the Recycle Bin. This only works under one condition: your SD card must have been connected to your computer through a reader that treats it like a local or external drive (not just removable media). In such setups, files deleted from the SD card are temporarily moved to the Recycle Bin, just like regular files on your desktop or documents folder. This makes recovery incredibly easy—no scanning, no additional software, just a few clicks to restore. If you’ve only recently deleted your files and haven’t emptied the Recycle Bin, this method should be your first stop. It’s fast, risk-free, and completely free. The trick is knowing how to check for SD card files in the Bin and ensuring they haven't been permanently erased. Here’s how to recover your photos using this simple but often overlooked method.
How to Check Recycle Bin for SD Card Photos:
Step 1: Connect SD Card via Adapter
Step 2: Open Recycle Bin
- Double-click the Recycle Bin on your desktop.
Step 3: Search or Sort
- Look for your deleted photos by file type or date deleted.
Step 4: Right-click > Restore
- Select and restore the photos to their original location.
Way 4: Try CHKDSK to Fix Logical Errors and Access Hidden Files
Sometimes, your SD card may appear empty or unreadable, even though you haven’t deleted any files. In such cases, logical errors or file system corruption might be hiding your photos rather than deleting them outright. That’s where Windows CHKDSK (Check Disk) comes into play. CHKDSK is a command-line utility that scans drives for errors and attempts to fix them. Although it’s not technically a recovery tool, it can resolve inconsistencies that prevent the operating system from reading the card properly. In some cases, running CHKDSK can restore file directory access, repair allocation tables, and help your photos become visible again without needing any software installation. It’s a highly recommended first step before assuming permanent data loss—especially if your SD card shows a “drive not accessible” or “needs formatting” message. Follow these steps to run CHKDSK on your SD card and possibly rescue your hidden files.
Step 1: Insert the SD Card
- Connect it to your PC using a card reader.
Step 2: Open Command Prompt (Admin)
- Type cmd in Windows Search > Right-click > Run as Administrator.
Step 3: Run the Command
Step 4: Wait and Check
- After the process completes, check if the files are restored.
Note: This doesn’t recover deleted files but helps if files are invisible due to corruption.
Way 5: Use Windows PowerShell to Search for Hidden or Temporary Files
Sometimes, photos on your SD card are not lost—they’re just hidden. This can happen due to malware, accidental changes to file attributes, or file system errors. Fortunately, Windows PowerShell provides a powerful command-line interface that can help you uncover these invisible files. PowerShell allows you to scan the entire SD card, recursively searching for hidden or system-marked files that aren’t visible through regular browsing. It can even help locate files renamed with strange characters or extensions. This method doesn’t require any third-party software, making it a free and tech-savvy way to explore your SD card’s full contents. It’s especially useful if you suspect your SD card was compromised or files were affected by a virus. While this solution is more advanced, the steps are straightforward and safe to perform. Let’s dive into how to use PowerShell to track down and reveal hidden SD card photos effectively.
How to Use PowerShell:
Step 1: Connect SD Card
Step 2: Open PowerShell (Admin)
- Type PowerShell in Search > Run as Administrator.
Step 3: Enter Command
(Replace E:\ with your SD card path.)
Step 4: Unhide Files
- If hidden photos appear, use File Explorer to right-click > Properties > uncheck "Hidden".
Extra Tip: What Not to Do After Deleting SD Card Photos
To maximize your recovery chances:
- Don’t save new data to the SD card.
- Avoid formatting again.
- Immediately try data recovery solutions.
Frequently Asked Questions
What’s the safest way to recover photos without any software?
Try the Recycle Bin or File History method first. These involve no third-party tools and are built into Windows.
Is it really possible to recover deleted photos from an SD card for free?
many methods—like CHKDSK, Recycle Bin, File History, and PowerShell—are completely free. For full recovery, iDatApp Data Recovery offers a free scan and preview.
Can formatted SD cards be recovered?
Yes. If not overwritten, formatted SD card data is still recoverable using professional tools like iDATAPP.
Will data recovery software damage my SD card?
No. Reputable tools like iDatApp are read-only and do not write or modify your card’s data.
Can I use these methods on a phone’s SD card?
Yes. Just remove the SD card from your phone, connect it via card reader, and use the same steps.
Summary
Recovering photos from an SD card for free is absolutely possible—if you act fast and use the right techniques. Whether it’s using built-in Windows tools like CHKDSK and File History, or unlocking the full potential of professional solutions like iDATAPP Data Recovery, this guide gives you the power to get your precious memories back.
Don’t panic when photos vanish. Just follow the steps in this guide—and they may be only a few clicks away from recovery.