How to Recover Deleted Photos from Vivo Phone
2023 The most detailed and comprehensive collection of tips and methods for recovering photos on vivo phones.

In the era of smartphones, our devices have become an integral part of our lives, capturing precious moments through the lens of their powerful cameras. However, the loss of photos from a Vivo phone can be distressing. Fortunately, with the right tools and techniques, it's possible to recover those cherished memories. In this comprehensive guide, we will explore various methods to recover photos from your Vivo phone, ensuring that no precious moment is lost forever.
Losing photos from your Vivo phone can occur due to various reasons such as accidental deletion, system errors, software malfunctions, or even physical damage to the device. Regardless of the cause, the good news is that in most cases, the photos can be recovered through effective data retrieval methods. Let's delve into the different approaches you can take to restore your lost photos.
Guide List
- Method 1: Utilizing Vivo Cloud Backup
- Method 2: Restoring from Google Photos
- Method 3: Employing iDATAPP Android Data Recovery Software
- Method 4: Utilizing Vivo Recovery Mode
- Method 5: Seeking Professional Assistance
- Ways to Backup Photos On Your Vivo Phone
- Tips: How to Prevent Photos from Being Lost on Your Vivo Phone
- Video Guide
- Conclusion
Method 1: Utilizing Vivo Cloud Backup
One of the most convenient ways to recover your lost photos is through Vivo Cloud Backup.
Vivo provides a reliable cloud storage service that automatically syncs and backs up your data, including photos, to the cloud. If you have previously enabled this feature on your Vivo phone, follow these steps to recover your lost photos:
- Open the Settings app on your Vivo phone.
- Navigate to "Accounts" or similar options.
- Tap on "Vivo Cloud" or "Cloud Services."
- Select "Restore" or "Restore Data."
- Choose the desired backup file containing your lost photos.
- Follow the on-screen instructions to restore your photos.
Method 2: Restoring from Google Photos
Another effective method for photo recovery involves utilizing Google Photos, a popular cloud-based photo storage service.
If you had previously enabled the "Backup & Sync" feature in the Google Photos app on your Vivo phone, your photos may have been automatically backed up to your Google account. To retrieve your lost photos using this method:
- Open the Google Photos app on your Vivo phone.
- Sign in to your Google account if prompted.
- Tap on the menu icon (three horizontal lines) in the top-left corner.
- Select "Trash" from the menu options.
- Browse through the deleted photos and select the ones you want to recover.
- Tap on the "Restore" button to retrieve the selected photos.
Method 3: Employing iDATAPP Android Data Recovery Software
Android Data Recovery Software is a reliable and efficient tool designed specifically for recovering lost or deleted data from Android devices, including Vivo phones.
This software offers a user-friendly interface and advanced scanning algorithms to thoroughly scan your Vivo phone's internal storage or external SD card for recoverable data, including photos. Here's how you can use iDATPAP Android Data Recovery Software to recover your lost photos:
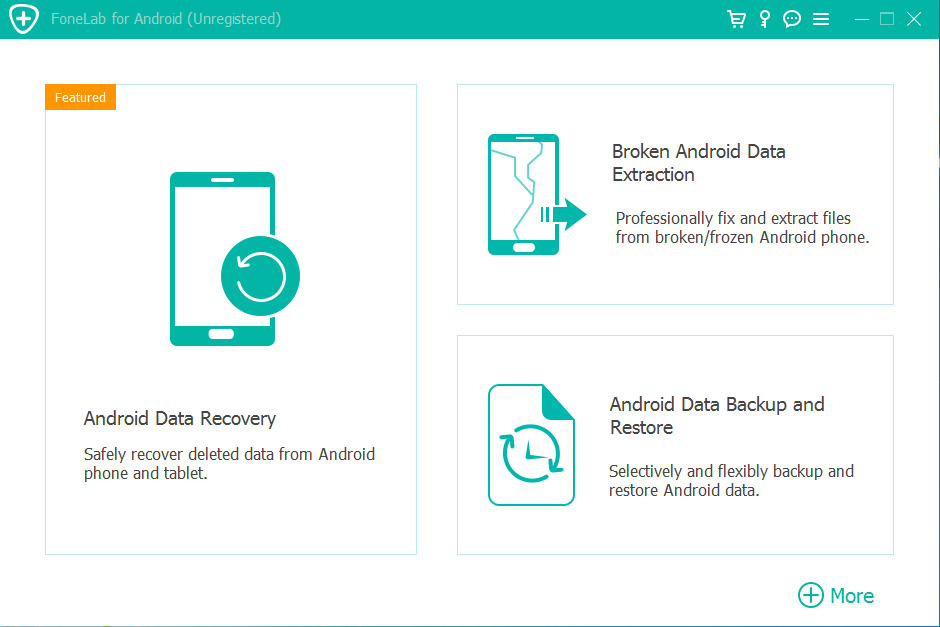
Step 1: Download and install the software on your computer.
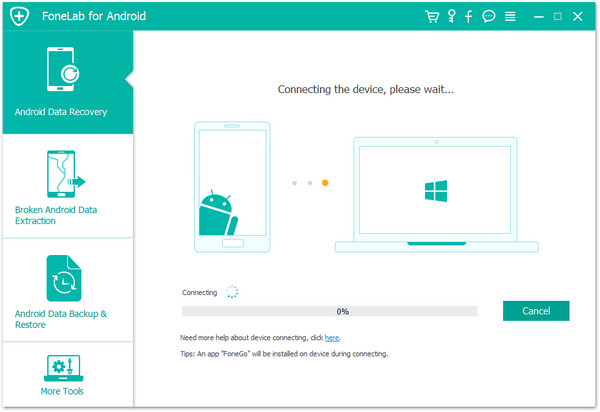
Step 2: Connect your Vivo phone to the computer using a USB cable.
Launch the iData Android Data Recovery Software and follow the on-screen instructions to establish a successful connection between your Vivo phone and the software.
Once the connection is established, the software will detect your Vivo phone and display it as a connected device.
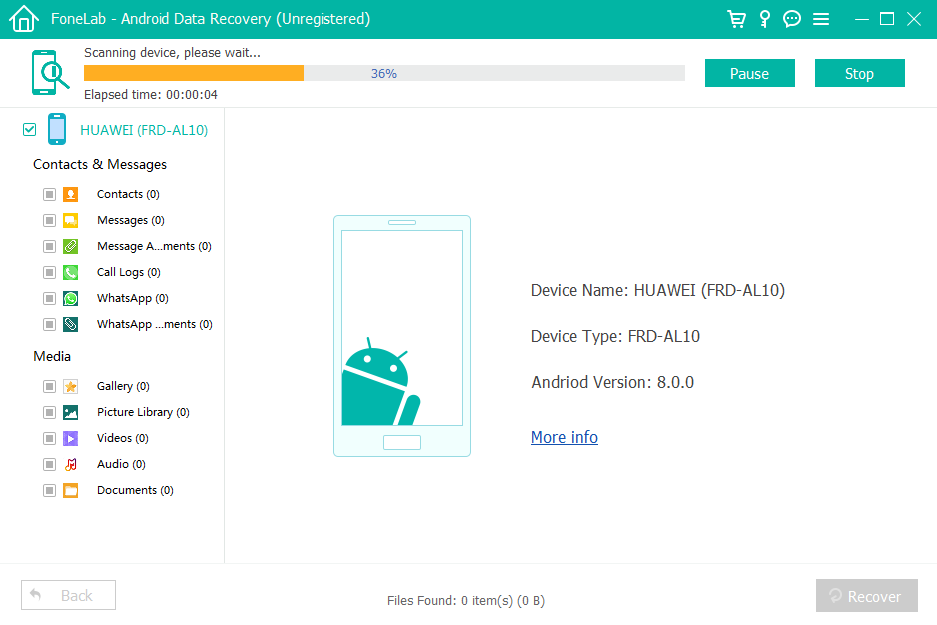
Step 3: Select the file types you want to recover, such as "Photos" in this case, and click on the "Start" or "Scan" button to initiate the scanning process.
The software will scan your Vivo phone's storage for recoverable photos. This process may take some time, depending on the size of your storage and the amount of data to be scanned
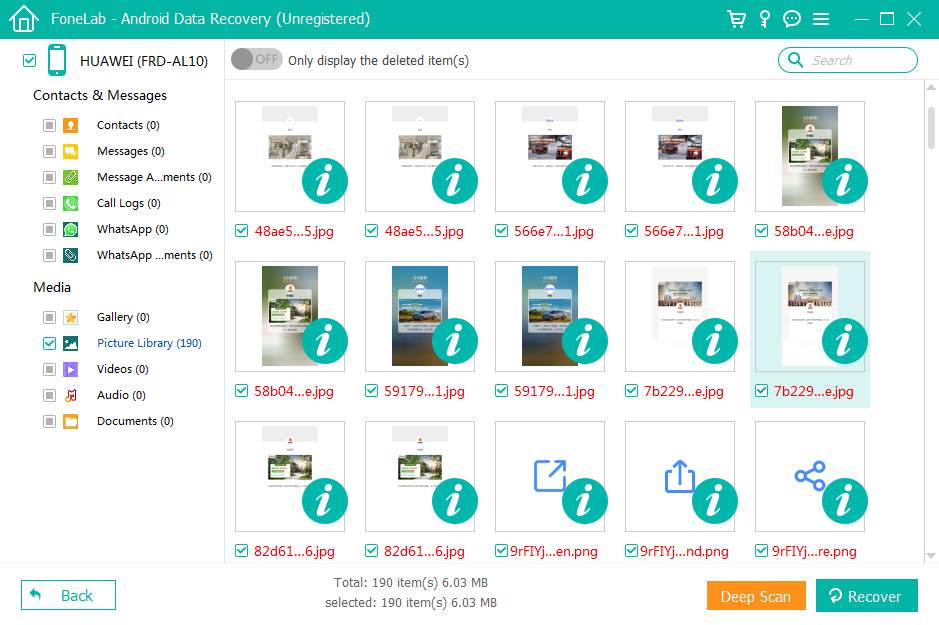
Once the scan is complete, you will be presented with a list of recoverable photos.
Preview the photos to verify their quality and select the ones you want to recover.
Step 4: Click on the "Recover" button to initiate the photo recovery process. Choose a safe location on your computer to save the recovered photos.
Wait for the software to complete the recovery process. Once done, you will have successfully recovered your lost photos from your Vivo phone using iDATAPP Android Data Recovery Software.
Method 4: Utilizing Vivo Recovery Mode
Vivo phones have a built-in recovery mode that can be used to recover lost photos and other data.
To access Vivo Recovery Mode and recover your lost photos, follow these steps:
- Power off your Vivo phone completely.
- Press and hold the Volume Up button and the Power button simultaneously until the Vivo logo appears on the screen.
- Release both buttons and wait for the Vivo Recovery Mode menu to appear.
- Use the volume buttons to navigate through the options and the Power button to select.
- Select the "Recovery Mode" or "Recover Lost Data" option.
- Follow the on-screen instructions to start the recovery process.
- Once the recovery process is complete, your Vivo phone will reboot, and you should be able to access your recovered photos.
Method 5: Seeking Professional Assistance
In cases of severe physical damage or extensive software issues, seeking professional assistance can be the most effective option.
If your Vivo phone has suffered physical damage or encounters complex software problems, it is advisable to consult a professional data recovery service. These specialists possess the necessary expertise, tools, and facilities to recover your lost photos in situations where conventional methods may fail. Seek out a reputable data recovery service in your area or contact Vivo's customer support for guidance.
Ways to Backup Photos On Your Vivo Phone
In today's digital age, our smartphones have become repositories of precious memories captured through the lens of their powerful cameras. Losing these irreplaceable photos can be devastating. That's why it's crucial to have a reliable backup strategy in place for your Vivo phone photos. In this article, we will explore several easy-to-operate methods to backup your Vivo phone photos, ensuring that your memories are safe and accessible whenever you need them.
Method 1: Utilize Vivo Cloud Backup
Vivo provides a convenient cloud storage service called Vivo Cloud, which allows you to automatically sync and backup your data, including photos. Follow these steps to backup your Vivo phone photos using Vivo Cloud:
- Open the Settings app on your Vivo phone.
- Navigate to "Accounts" or similar options.
- Tap on "Vivo Cloud" or "Cloud Services."
- Sign in to your Vivo account or create a new account if you haven't already.
- Enable the "Backup & Sync" feature for photos.
- Customize the backup settings according to your preferences.
- Once enabled, your Vivo phone photos will be automatically backed up to Vivo Cloud.
Method 2: Use Google Photos for Backup
Google Photos is a popular cloud-based photo storage service that seamlessly integrates with your Vivo phone. It offers free storage space and convenient backup options. Follow these steps to backup your Vivo phone photos using Google Photos:
- Download and install the Google Photos app from the Google Play Store if you haven't already.
- Launch the app and sign in with your Google account or create a new account.
- Tap on the menu icon (three horizontal lines) in the top-left corner of the app.
- Select "Settings" from the menu options.
- Tap on "Backup & sync" and toggle the switch to enable it.
- Customize the backup settings, such as upload quality and whether to include videos.
- Once enabled, your Vivo phone photos will be automatically backed up to your Google account.
Method 3: Transfer Photos to Your Computer
Transferring your Vivo phone photos to your computer is a reliable method of backup. It not only creates an additional copy of your photos but also frees up storage space on your phone. Follow these steps to transfer photos from your Vivo phone to your computer:
- Connect your Vivo phone to your computer using a USB cable.
- On your phone, swipe down from the top of the screen to access the notification panel.
- Tap on the USB connection notification and select "File Transfer" or "Media device."
- On your computer, open a File Explorer window (Windows) or Finder (Mac).
- Locate your Vivo phone under "This PC" or "Devices" in the File Explorer or Finder.
- Open your Vivo phone's storage and navigate to the "DCIM" or "Pictures" folder.
- Select the photos you want to backup and copy them to a folder on your computer.
- Once the transfer is complete, safely disconnect your Vivo phone from the computer.
Method 4: Backup to an External Storage Device
Backing up your Vivo phone photos to an external storage device, such as a USB flash drive or an external hard drive, provides an additional layer of protection. Follow these steps to backup your photos to an external storage device:
- Connect your external storage device, such as a USB flash drive, to your Vivo phone using an OTG (On-The-Go) cable.
- On your Vivo phone, go to the "Files" app or a file manager app of your choice.
- Navigate to the location of your photos (e.g., DCIM or Pictures folder).
- Select the photos you want to backup and tap on the "Copy" or "Move" option.
- Choose the external storage device as the destination folder.
- Wait for the transfer to complete, ensuring that all selected photos are successfully copied to the external storage device.
- Safely disconnect the external storage device from your Vivo phone.
Method 5: Using iDATAPP Android Data Backup & Restore Software
iDATAPP Android Data Backup & Restore software provides a user-friendly and efficient way to backup and restore data from your Vivo phone, including your cherished photos. Follow these steps to backup your Vivo phone photos using iData Android Data Backup & Restore software:
Step 1: Download and install the software on your computer. Ensure you choose the correct version compatible with your operating system.
Launch the Android Data Backup & Restore software on your computer.
Step 2: Connect your Vivo phone to the computer using a USB cable.
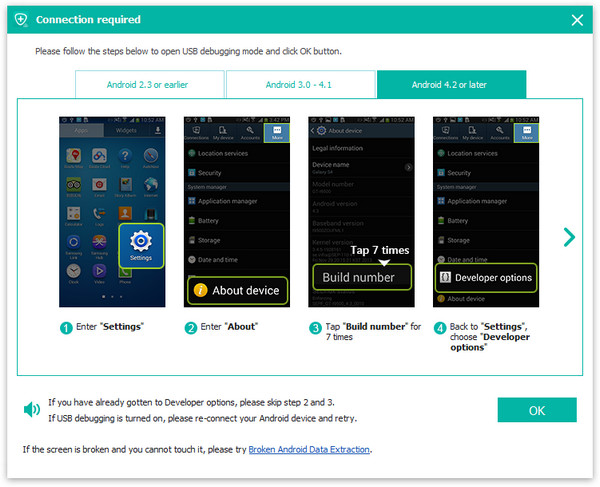
Enable USB debugging on your Vivo phone by going to "Settings" > "Developer options" > "USB debugging." If you don't see the "Developer options" menu, go to "Settings" > "About phone" > tap on "Build number" seven times to unlock developer options.
Once USB debugging is enabled, the software will detect your Vivo phone automatically. You may need to authorize the computer from your phone to establish a successful connection.
Step 3: Once the connection is established, select the "One-Click Backup" option in the software's interface.
You will be presented with a list of data types to backup. Select "Photos" or any other data types you want to include in the backup process.
Choose a backup location on your computer where the backup files will be stored.
Review the backup settings and options, such as file format and compression.
Step 4: Double-check that your Vivo phone is connected and click on the "Start" or "Backup" button to initiate the backup process.
The software will now begin to backup your Vivo phone photos to the specified location on your computer. The duration of the process will depend on the size of the data being backed up.
Once the backup is complete, you will receive a notification indicating the successful backup of your Vivo phone photos.
Congratulations! You have successfully backed up your Vivo phone photos using iData Android Data Backup & Restore software. Your precious memories are now safely stored on your computer, ready to be restored whenever needed.
Remember to regularly perform backups to ensure that your photo collection remains protected. With iData Android Data Backup & Restore software, you can have peace of mind knowing that your Vivo phone photos are securely backed up and preserved.
Tips: How to Prevent Photos from Being Lost on Your Vivo Phone
Losing precious photos from your Vivo phone can be a distressing experience. To avoid such situations and ensure the safety of your photo collection, it's important to take preventive measures. In this guide, we will explore effective strategies to prevent photos from being lost on your Vivo phone. Follow these steps to safeguard your memories:
1. Enable Automatic Backup
Take advantage of automatic backup features provided by your Vivo phone or third-party applications. This ensures that your photos are regularly backed up without any manual effort. Enable the backup feature by following these steps:
- Vivo Cloud Backup: Open the Settings app, navigate to "Accounts" or similar options, select "Vivo Cloud," and enable the "Backup & Sync" feature for photos.
- Google Photos: Download and install the Google Photos app from the Google Play Store, sign in with your Google account, and enable the "Backup & sync" option in the settings.
2. Use Cloud Storage Services
Utilize cloud storage services to store your photos securely. These services provide remote storage, ensuring that your photos are accessible even if your Vivo phone is lost or damaged. Follow these steps to use cloud storage:
- Vivo Cloud: Sign in to your Vivo Cloud account and enable photo backup. Your photos will be automatically synced to the cloud.
- Google Drive, Dropbox, or OneDrive: Install the respective app, create an account, and enable photo backup or syncing. Customize the settings as per your preferences.
3. Regularly Transfer Photos to a Computer
Transferring your photos to a computer provides an additional layer of protection. Follow these steps to transfer photos from your Vivo phone to a computer:
- Connect your Vivo phone to your computer using a USB cable.
- Access the file transfer or media device mode on your phone.
- Open the file explorer on your computer and navigate to your Vivo phone's storage.
- Copy and paste or drag and drop the photos from your phone to a folder on your computer.
4. Organize and Sort Photos
Properly organizing and sorting your photos can help you locate and manage them more effectively. Create folders or albums based on dates, events, or specific categories. This reduces the chances of accidentally deleting or misplacing photos.
5. Avoid Deleting Photos Hastily
Be cautious when deleting photos from your Vivo phone. Double-check the selected photos before confirming deletion. Consider reviewing photos in the "Recently Deleted" folder (if available) before permanently removing them.
6. Protect Your Vivo Phone
Taking precautions to protect your Vivo phone reduces the risk of physical damage or loss. Use a protective case and screen protector to safeguard against accidental drops or scratches. Additionally, consider enabling security features, such as a passcode, fingerprint lock, or facial recognition.
7. Regularly Update System and Apps
Keep your Vivo phone's operating system and apps up to date. System and app updates often include bug fixes and security patches that can prevent data loss or improve overall stability.
8. Avoid Unauthorized Modifications
Avoid making unauthorized modifications or rooting your Vivo phone. Unauthorized modifications can void the warranty and potentially lead to data loss or instability.
By following these preventive measures, you can significantly reduce the risk of losing your precious photos on your Vivo phone. Remember, prevention is key, and regularly backing up your photos is the best way to ensure their safety. Take the necessary steps today and enjoy peace of mind, knowing that your photo collection is secure.
Video Guide
More Guides from Twitter Youtube, Facebook
Conclusion
In this guide, we have explored multiple methods to help you retrieve your lost photos, including utilizing Vivo Cloud Backup, Google Photos, iDATAPP Android Data Recovery Software, Vivo Recovery Mode, Vivo Data Recovery Apps, and seeking professional assistance. Remember to back up your photos regularly to prevent future data loss and consider implementing a combination of these methods for increased chances of successful recovery. With the right approach and tools, you can restore those precious memories and continue to capture new ones with your Vivo phone.