iDATAPP Video Repairer can help fix/restore videos with lost or corrupted data.
How Do I Convert Large Videos Without Losing Quality?
Large videos lose quality when compression settings are wrong. Using proper codecs, high bitrate, or iDatapp AI Video Converter lets you convert big files while preserving sharpness, clarity, and original detail.

Large videos are both a blessing and a curse. On one hand, they capture crisp details, clean textures, rich colors, and beautiful moments. On the other hand, they’re heavy, slow to upload, difficult to send, and often impossible to play smoothly on every device. So the question practically every creator, editor, and regular user asks at some point is:
Guide List
- How do I convert large videos without losing quality?
- Why Large Videos Lose Quality During Conversion (The Real Explanation)
- Method 1: High-Quality Conversion Using iDatapp AI Video Converter (Recommended)
- Method 2: Convert Using High Bitrate + Smart Codec Selection (Manual Precision)
- Method 3: Use Lossless or Near-Lossless Formats Before Final Compression
- My Large Videos Became Corrupted or Unplayable — How Do I Fix Them?
- Frequently Asked Questions
How do I convert large videos without losing quality?
It sounds simple—just “convert the file”—but once you deal with massive 4K recordings, hour-long screen captures, drone footage, or Dolby Vision movies, you quickly learn that quality loss is a real threat. Pixelation. Banding. Washed-out color. Missing detail. Blurry motion. These issues happen because conversion tools often shrink file size by reducing bitrate, changing the codec, or applying aggressive compression.
So the challenge is balancing compatibility, compression, and quality—without destroying the visual integrity of the original file.
Let’s break down the problem, explore the real technical reasons behind quality loss, and then walk through three powerful methods to convert large videos while preserving the original crispness. After that, we’ll discuss a related issue many users face (and how another tool on our website solves it).
This guide is designed to feel like someone is talking to you—not lecturing—so let’s dive in.
Why Large Videos Lose Quality During Conversion (The Real Explanation)
Every video is built from three core elements:
- Codec — the algorithm that compresses the video (H.264, H.265, VP9, ProRes, etc.)
- Bitrate — how much data is allocated per second (more bitrate = more detail)
- Resolution & color profile — 1080p vs 4K vs 8K, SDR vs HDR
When you convert a large video, most converters reduce bitrate, downgrade the codec profile, or alter the chroma subsampling to make the output file smaller or more compatible. This is why some converted videos look softer, blockier, or faded.
But you can convert videos without losing quality—if you choose the right method.
Below are the three best solutions.
Method 1: High-Quality Conversion Using iDatapp AI Video Converter (Recommended)
If your goal is maximum quality retention, especially for large 4K or high-bitrate files, using a dedicated converter built for high-precision encoding is the best option. iDatapp AI Video Converter is designed to preserve image clarity while optimizing codec selection—meaning you get a clean MP4, MOV, or HEVC file without sacrificing detail.
The advantage of this tool is that it automatically analyzes your video’s resolution, color space, bitrate, and codec, then chooses safe conversion parameters that maintain sharpness and visual integrity.
Steps
1.Install iDatapp AI Video Converter.
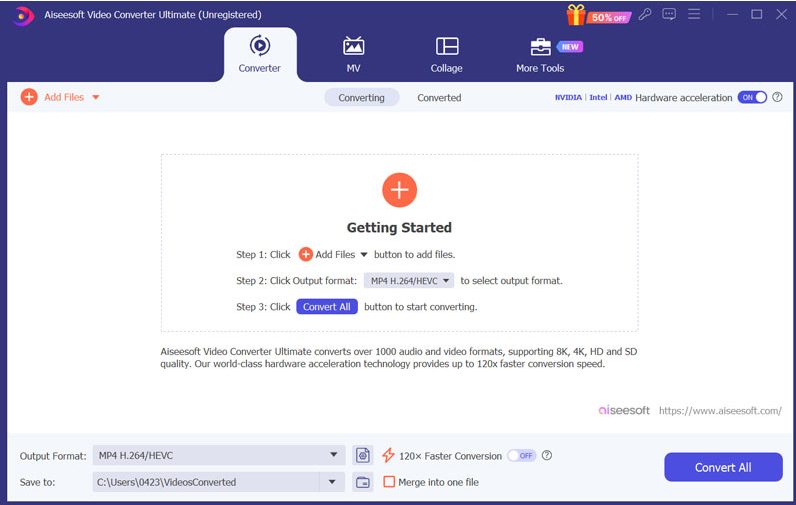
2.Import your large video (any format: MKV, MOV, AVI, MP4, HEVC, etc.).

3.Choose High-Quality Mode or select Lossless/High Bitrate in the output settings.
4.Select your preferred format (MP4, MOV, H.265, etc.).
5.Click Convert All, let the AI optimization complete, and export the new file.
Pro tip:
If you choose H.265, you get same-quality output at smaller file sizes—perfect for archiving or uploading.
Method 2: Convert Using High Bitrate + Smart Codec Selection (Manual Precision)
If you want to avoid software presets and manually tweak your quality settings, here’s the simple rule:
never reduce bitrate unless necessary, and always choose a modern codec.
H.264 works well, but for large videos, H.265/HEVC offers a better quality-to-size ratio. By manually setting a high bitrate (or constant quality mode), you can keep your video looking nearly identical to the original.
This approach is perfect for users who enjoy precision, such as filmmakers, editors, or advanced hobbyists.
Steps
1.Open a video conversion tool that lets you adjust bitrate manually.
2.Import your large source file.
3.Choose output codec:
- H.265 (best balance of small size + quality)
- H.264 High Profile (max compatibility)
4.Set bitrate to match or slightly exceed the original file.
5.Set CRF 16–20 (if available) for minimal quality loss.
6.Keep original resolution and frame rate.
7.Convert and review the output.
Pro tip:
When in doubt, match bitrate + codec profile to the source file's details. This alone prevents 80% of quality loss.
Method 3: Use Lossless or Near-Lossless Formats Before Final Compression
If your large video comes from editing software like Premiere Pro, DaVinci Resolve, or Final Cut, you have access to lossless or mezzanine codecs such as ProRes, DNxHR, FFV1, or H.265 Lossless. Exporting into one of these high-fidelity formats before converting preserves every detail.
After that, you can convert the file into your preferred delivery or playback format without stacking compression losses.
This method is excellent for camera footage, YouTube edits, or archival work.
Steps
1.Export your video from your editor using:
- Apple ProRes 422 or 4444
- DNxHR HQX
- H.265 Lossless
2.Ensure you’re exporting at full resolution (1080p/4K/8K).
3.After exporting the master file, open your preferred converter.
4.Convert to your desired format (MP4, H.264, H.265) without touching resolution.
5.Keep high bitrate or CRF low (closer to lossless range).
6.Save your master file for future conversions.
Pro tip:
Think of this like saving a Photoshop PSD before exporting a JPG. You’re protecting your master.
My Large Videos Became Corrupted or Unplayable — How Do I Fix Them?
onverting videos without losing quality is a common concern—but an even more stressful situation is when your large videos become corrupted, missing, or unplayable before you can even convert them. This happens more often with big files (4K recordings, long project exports, drone footage) because large files are more sensitive to:
- interrupted transfers
- SD card errors
- bad sectors
- camera shutdowns
- crashed rendering software
- incomplete downloads
- file system damage

Imagine spending an hour recording a beautiful cinematic landscape, only to plug in your SD card and find the file showing “0 bytes” or “Cannot open video.”
This happens across cameras, phones, drones, and computers. Many users panic, assuming the footage is permanently lost. Fortunately, that’s usually not the case.
Most “corrupted” large videos still exist on the storage device—they’re just not readable because the file headers, indexes, or metadata are broken. The actual video data often remains intact.
This is where having a recovery tool becomes essential.
For users in this situation, a dedicated recovery solution from our website—such as iDatapp Video Repair Software (found on idatapp.com)—can scan the device at the sector level, locate damaged video fragments, reconstruct missing metadata, and rebuild the playable video.
It’s particularly effective for:
- corrupted MP4/MOV from phones
- drone recordings from DJI devices
- interrupted camera footage
- SD card “RAW format” videos
- USB/external drive video loss
- accidental deletion of large files
The software analyzes signature patterns in each video codec, identifies recoverable content, and restores a version of the video that can be opened without further damage.
So if your large video refuses to play—not because of conversion issues, but because it’s corrupted or missing—this recovery tool becomes the essential next step.
Frequently Asked Questions
Can I truly convert videos without losing quality?
Yes—if you use high bitrate settings, modern codecs like H.265, or tools that preserve resolution and color data.
What format keeps the best quality?
Lossless formats (ProRes, FFV1, DNxHR HQX) keep the most detail. For delivery formats, H.265 preserves quality best at smaller sizes.
Does converting to MP4 reduce quality?
Not necessarily. If you keep bitrate high and use H.264 High Profile or H.265, the quality remains nearly identical.
Why are my converted videos blurry?
Your converter likely lowered bitrate, changed resolution, or used an aggressive compression profile.
What is the easiest method for beginners?
Using a preset-based tool like iDatapp AI Video Converter ensures quality retention without requiring technical knowledge.
Conclusion
Large videos can be converted without losing quality if you use intelligent encoding, preserve bitrate, choose modern codecs, and rely on tools designed for high-fidelity output. With the right workflow—especially using iDatApp AI Video Converter—you can keep your videos crisp and clear while ensuring they play smoothly everywhere.